Create Online JEE MAINS,BITSAT EXAMS Using PHP,JS,CSS and MySQL!
There are mainly 4 steps in this tutorial:
1)Install xampp.
2)Open xampp ,start Apache server and Mysql.
3) Goto c:\xampp\htdocs\index.php and write some php code there one will find the output in localhost.
4)Create database(tables) in phpmyadmin to validate registered users when they login again.
1)INSTALL XAMPP ON YOUR LAPTOP:

CLICK ON THIS TO DIRECT TO DESIRED WEBPAGE!!!
1)Inorder to make use of php,one should download first xampp server!!! This is pretty simple, just goto “https://www.apachefriends.org/download.html” and click on xampp for windows and this will direct to a new page.
 There at bottom you will find a .exe file being downloaded ,so wait till the completion and click on all popups,ok buttons,next buttons untill you reach the finish button and after completion of all these processes you will be able to sucessfully install xampp on your laptop or computer.
2)CHECK XAMPP IS INSTALLED IN YOUR LAPTOP:
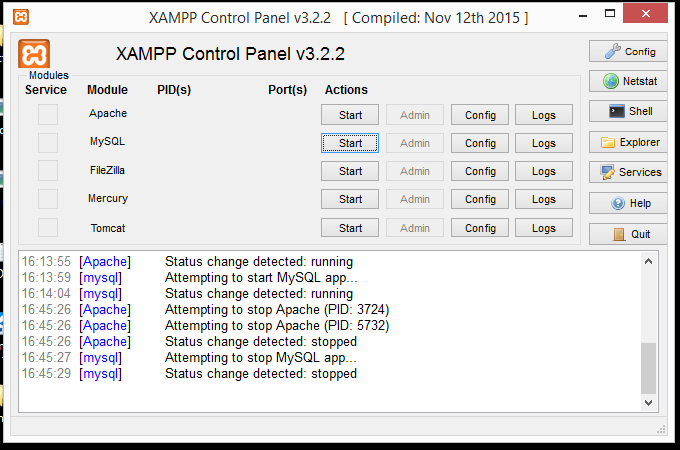
Type xampp in search then you will find “xampp control panel”,click on it you will find box which is similar to the above image.
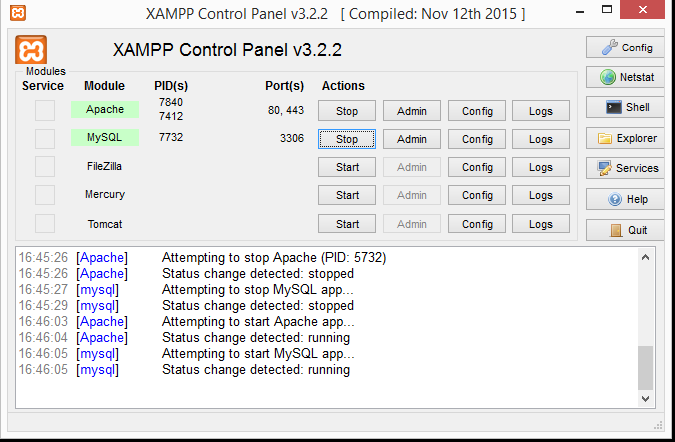
1)Click on the 1st start button to start the “LOCAL HOST” on your laptop.
2)Click on the 2nd start button to start the “MYSQL” server on your laptop. Mysql server is used for linking of the database,to your project if needed.Here we use database for registration of users and validation of the users who login to write the exam.
3)GOTO c:\xampp\htdocs\index.php,CODING PART:
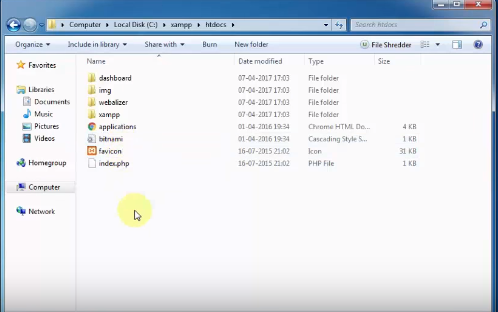
1.Whatever php code you write in the index.php ,the output will be displayed when you type the localhost in our laptop.
A.Here mainly we require mainly 5 php files,They are:
a)index.php
b)registration.php
c)registrationsucessful.php(USE.php in github)
d)questions.php(main part)
e)logout.php
B.I have used css for styling :
a)style.css(for buttons,initial login page)
b)quizz.css(for questions,buttons display)
4)CREATE A DATABASE REGISTER IN PHPMYADMIN:
a)Create a table registerpage with 5 attributes i.e; id , user_name , roll_no , phone_no , paswd.
for storing the registered user’s details.
b)AFTER CREATING IT WILL LOOK LIKE THIS:

>>>>>>>>>>>>>>>>>——-CODE EXPLAINATION:———>>>>>>>>>>>>>>——–>>>>>>>>>>>>>>>
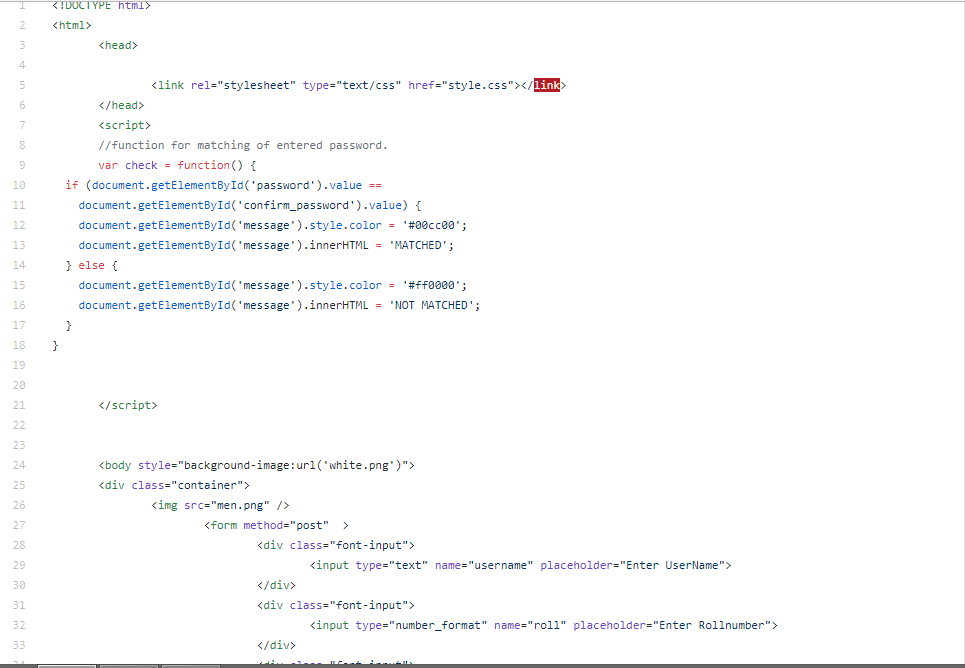
A)Code for login page :
new user should register first then he will be directed to registration.php by clicking on the button.
We have used css style.css.

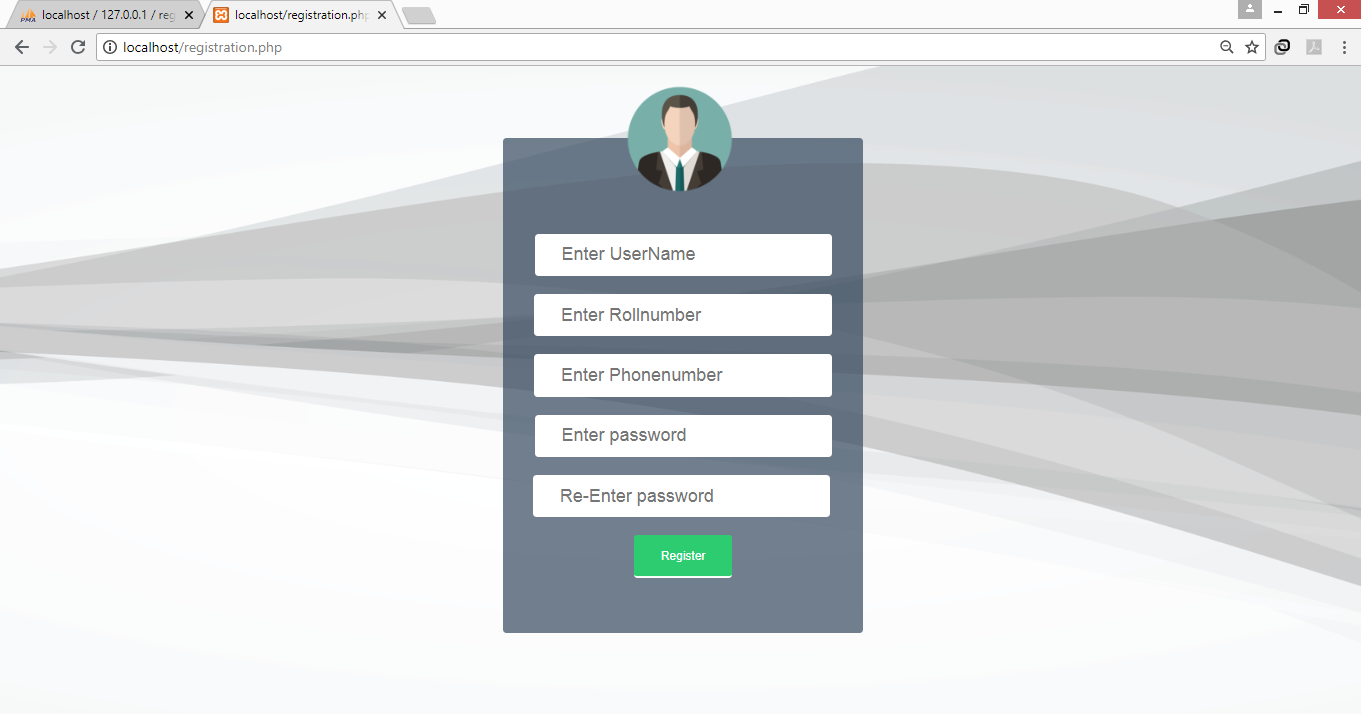
USER INTERFACE FOR THE ABOVE CODE:

B)VALIDATING LOGIN USER DETAILS BY SQL QUERY USING PHP:

C)REGISTRATION OF USER DETAILS TO DATABASE:
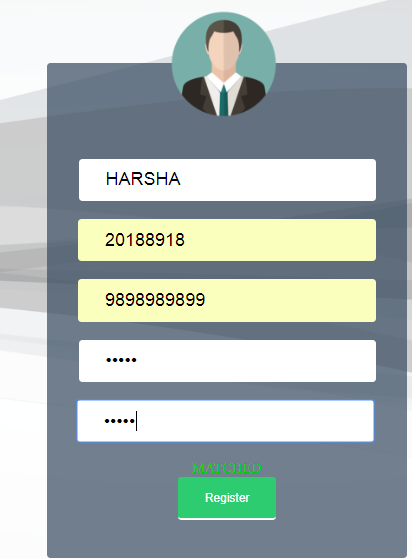
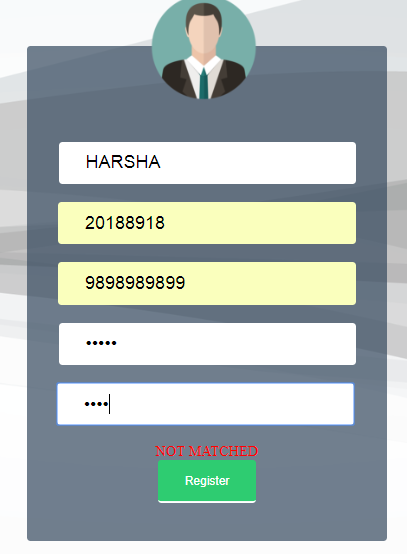
CODE FOR MATCHING RE-ENTERED PASSWORD WITH GREEN COLOR ,IF NOT MATCHED WILL GET RED COLOR.
USER INTERFACE RE-ENTERED PASSWORD MATCH:
USER INTERFACE RE-ENTERED PASSWORD DOESN’T MATCH:
HERE WE ARE USING ‘POST’ METHOD SO IT STORES THE VALUES IN RESPECTIVE VARIABLES SO THAT THAT THEY WILL BE USED FOR APPENDING USER DETAILS INTO DATABASE TABLE CALLED ‘registerpage’.
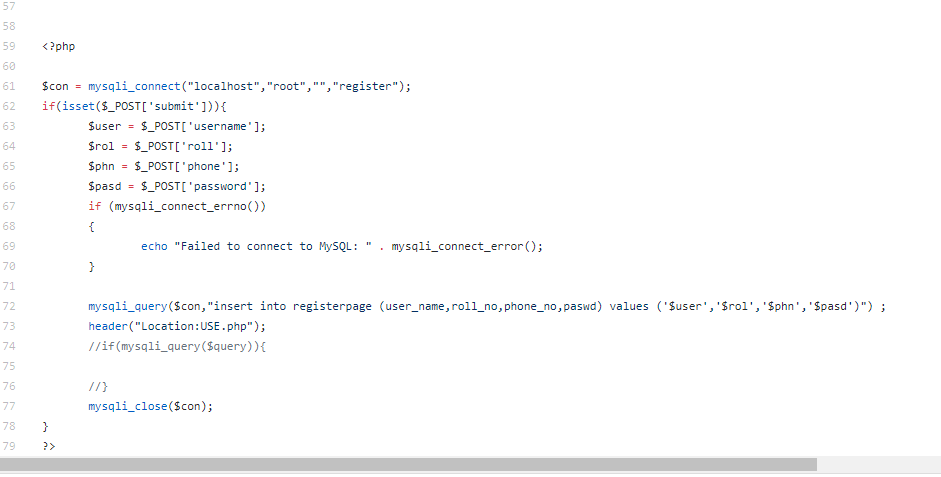
appending values into database through sql query in php.
we have used small code ‘header’ for directing to the USE.php once clicked on the register button.
FINAL UI WILL BE LIKE THIS:
ONCE CLICKED ON THE REGISTER BUTTON YOU WILL BE DIRECTED TO A NEW PAGE.

AFTER CLICKING ON ‘GO TO LOGIN’ BUTTON YOU WILL BE REDIRECTED TO LOGIN PAGE ,THEN LOGIN THERE YOU WILL BE CHECKED AND DIRECTED TO questions.php.
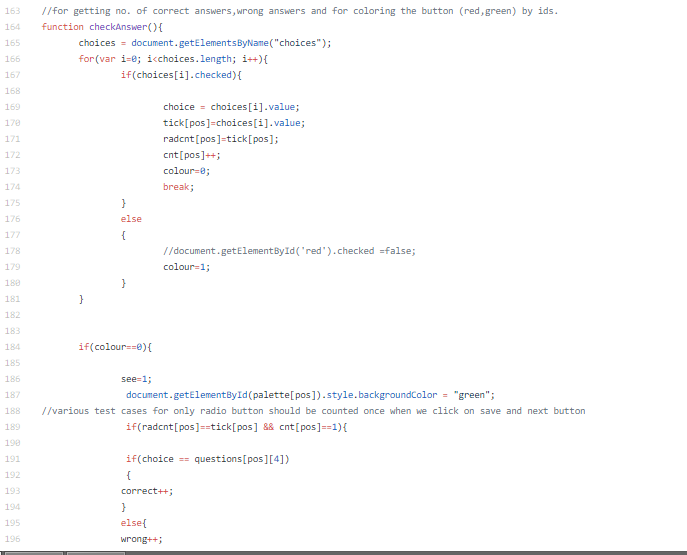
THERE OUR AWAITING PART COMES INTO PICTURE LOT OF CODING PART IS REQUIRED HERE,SO MANY TEST CASES.

FOR ACCESSING THE VARIABLES FROM OTHER .php files (mainly for user name dispaly that comes from index.php)

WE ARE STORING QUESTIONS IN 2-DIMENSIONAL ARRAY:

For displaying the previous opted options,we have used flag variables for storing the previous opted options and we are displaying the questions and answers in the middle box using css(test.innerHTML).
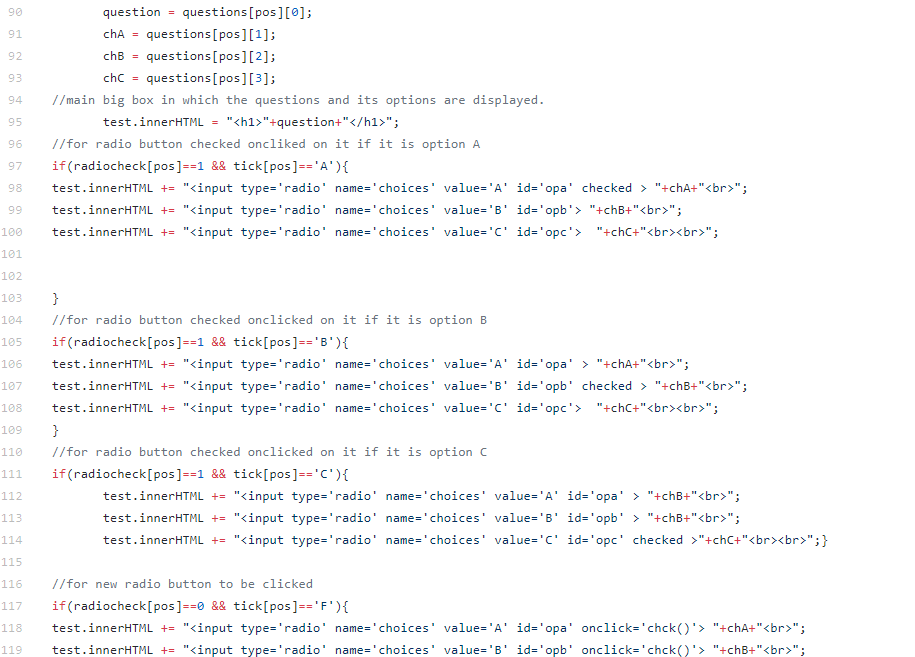
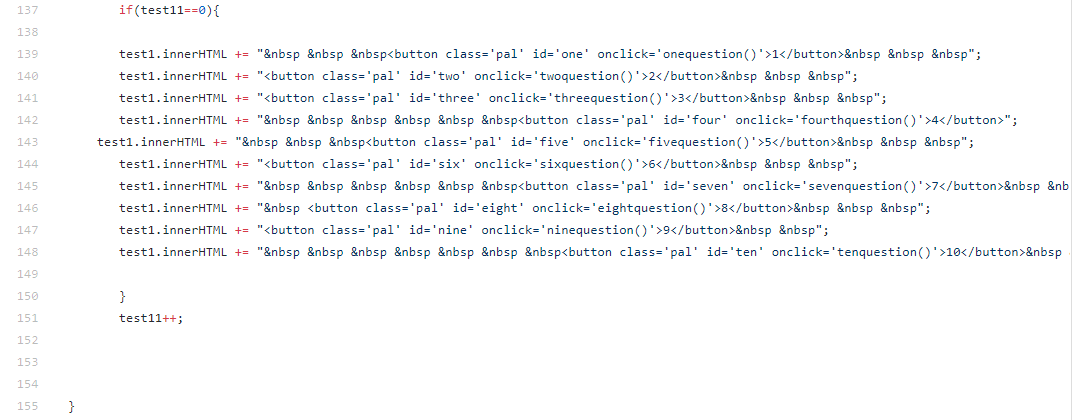
for displaying the buttons for respective questions and displaying them in the right small box ,we have used (test1.innerHTML)css code.
for capturing the previous opted options we used flag=1 for respective questions.

same like IITJEE MAINS we are using Save&Next button,MarkforReview button,Not answered buttons
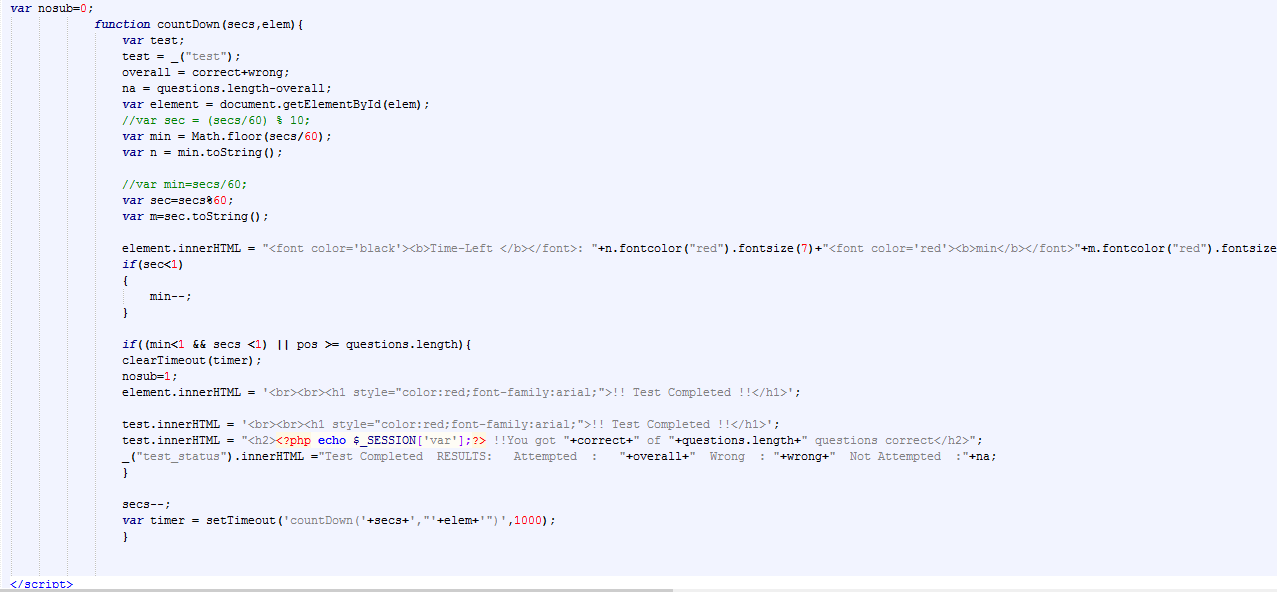
for TIME appearing we wrote code like this,main function:
![]()
we call the above function and decreasing the minutes by 1 if seconds<1
FOR SOURCE CODE WITH COMPLETE EXPLAINATION LINE TO LINE:
GITHUB LINK: https://github.com/SRIHARSHAVARRI/onlinequiz
IF U REALLY LIKE THIS PROJECT,PLZ GIVE ME A STAR IN GITHUB FOR THIS PROJECT!!!!!
THANK YOU!!!
HAPPY CODING FOLKS!!!

0 Comments