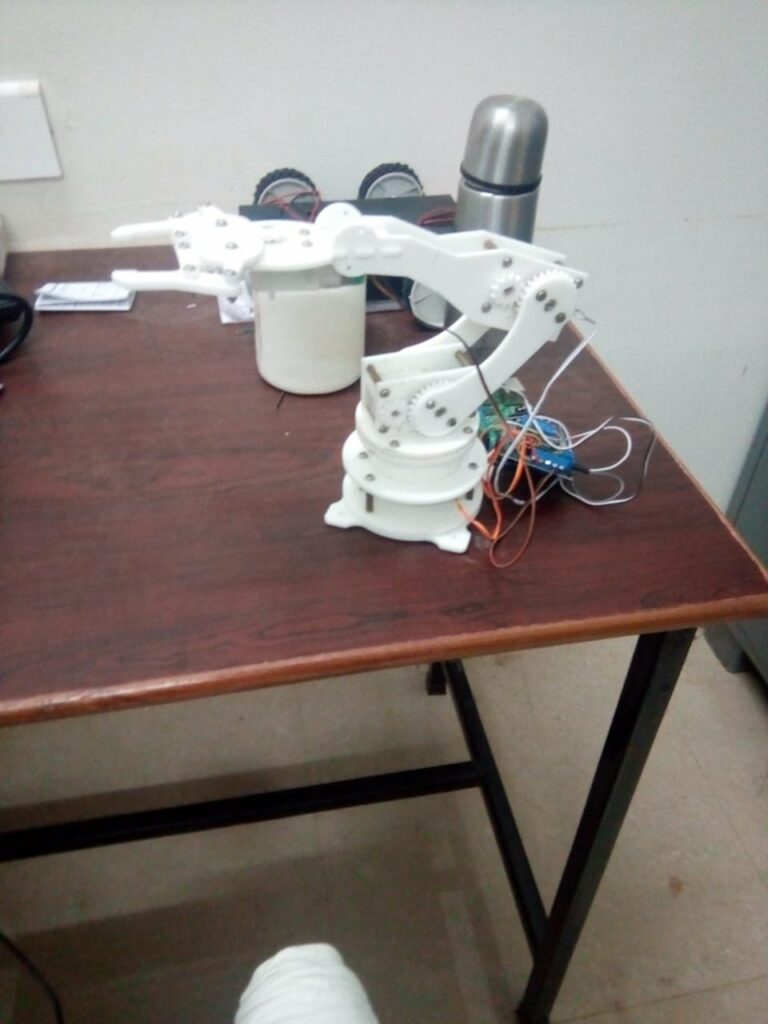
Multi-purpose Obstacle Detector and Picker
Multi-purpose Obstacle Detector and Picker is a robot whose main motto is to detect obstacles, pick them up if possible, and keep them in a bucket. Simply saying, it is a kind of a vacuum cleaner without a man to move it. This robot is mainly constructed using Arduino uno.
Construction of the robot:
Construction Of The Basic Robotic Car:
Write a code in Arduino software which has 4 switch conditions which gives output
High-High;
High-Low;
Low-High; and
Low-Low;
where high gives +5 volts as output and low gives 0 volts as output
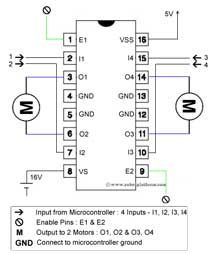
Connect the output port of the Arduino for an L293D IC. Before connecting; connect both the wheels on the left side of the robot as one and same for the right side wheels. For the given switch conditions, The robot moves forward, turns right, turns left, and stops respectively. Connections of the IC is as shown in the L293D.jpg.
Placing Ultra Violet Distance Sensing module :
In order to sense any object in front of the robot, we need an Ultra Violet Distance Sensing module.
This module gives us the distance of object in front of it. Write an Arduino code, setting a limit (for example 50cm) for the UV sensor, if there is any object less than 50cm from the robot, robot should stop (giving low-low output from Arduino). Place the module in front of the car.The connections are as shown in figure Uv.png.

Placing The Bucket :
Stick a bucket on the frame of the robot and place an Ultra Violet Distance Sensing module in it. This module is used to detect the percentage of bucket which is filled and percentage of the bucket remained empty. Write an Arduino code for the same.
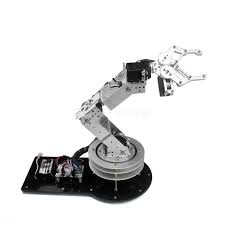
Construction Of The Basic Arm On The Robotic Car :
Write another Arduino code which has four switch cases for four motors present in the arm. Output of the 4 switch conditions must be as of the previous code, I.e.; High-High; High-Low; Low-High; and Low-Low; Which makes the first motor (claw) open and close, second motor (wrist of the claw) move up and down, third motor (elbow of the arm) move up and down, and the fourth motor (base of the motor) rotate clock wise and anti-clock wise. Connect four motors’ positive to one of the pins of the Arduino
(according to the code) and negative to ground of the Arduino. If there is more than 25% unoccupied space in the bucket, the picked object is put in the bucket, else, it doesn’t.
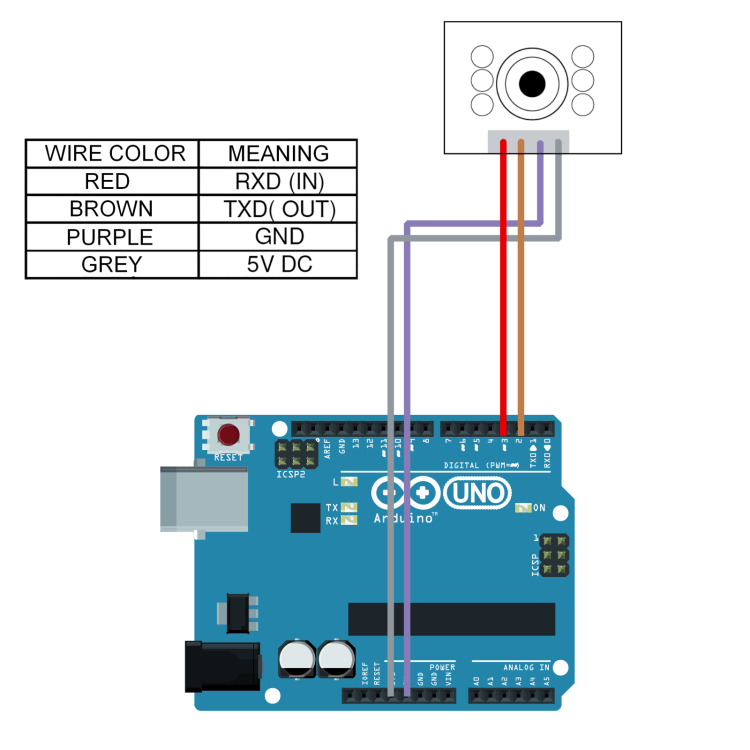
Placing Of The Camera :
Our project also has camera attached to it. The code and connections are given in the photos
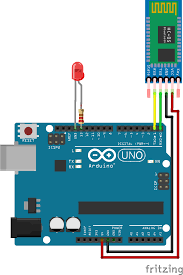
Placing Bluetooth:

Connect Bluetooth to Arduino, by connecting Bluetooth’s ground to Arduino’s ground, Bluetooth’s vcc to Arduino’s vcc, Bluetooth’s Tx to Arduino’s Tx (pin 0 of Arduino), and Bluetooth’s Rx to Arduino’s Rx (pin 1 of Arduino), as shown in the image. This Bluetooth is used to control robot’s movement from other Bluetooth device (our mobile).
Placing Wifi :
Wifi connections are similar to Bluetooth connections. Connect wifi module to the Arduino as shown in the image.
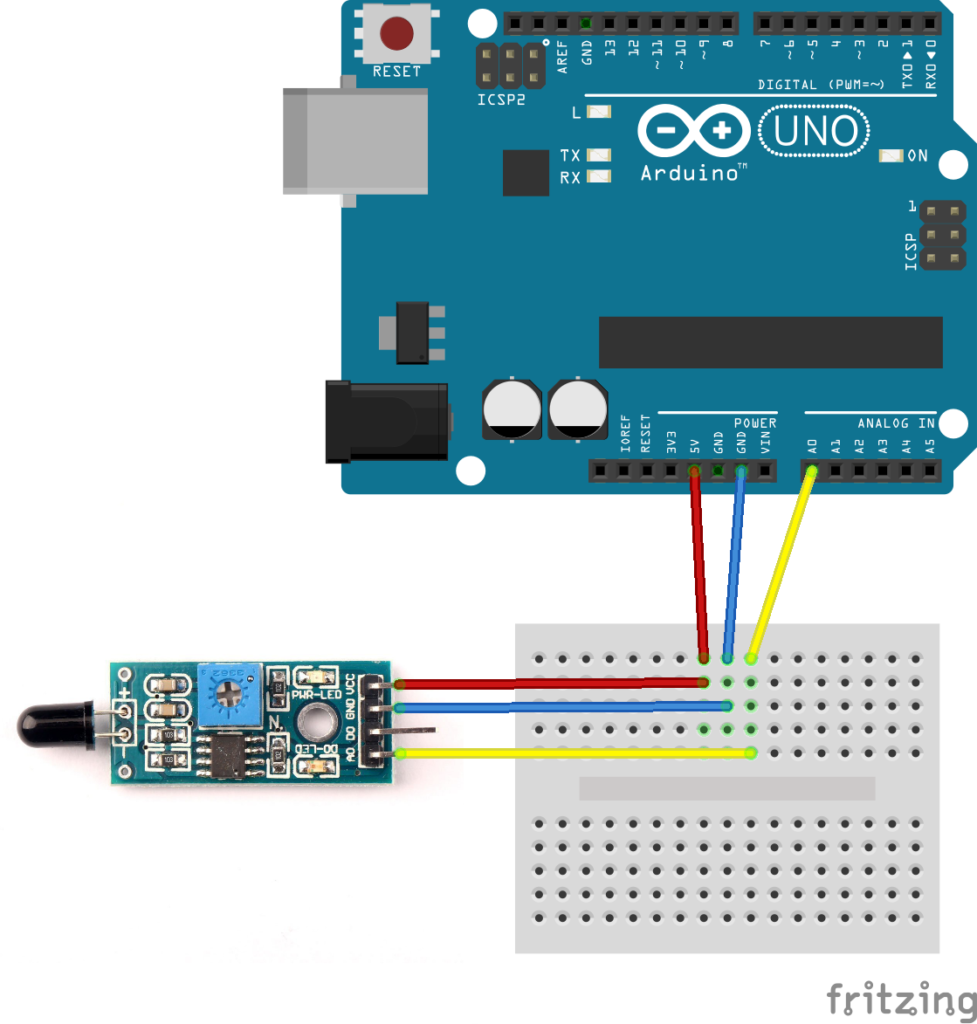
Placing Fire Sensor :
Fire sensor is the easiest sensor that is kept to our project. There are only 3 connections, one for ground, one for vcc, and one for Arduino input, which when fire is present, can show high value or one or fire detected (some message that can manually be set).
Placing Motion Detection sensor :
Motion detection sensor is also one of the sensors that are attached to our project. There are only 3 connections, one for ground, one for vcc, and one for Arduino input, which when motion is detected, can show high value or one or motion detected (some message that can manually be set ).
Placing Mq-135 air Quality Sensor :
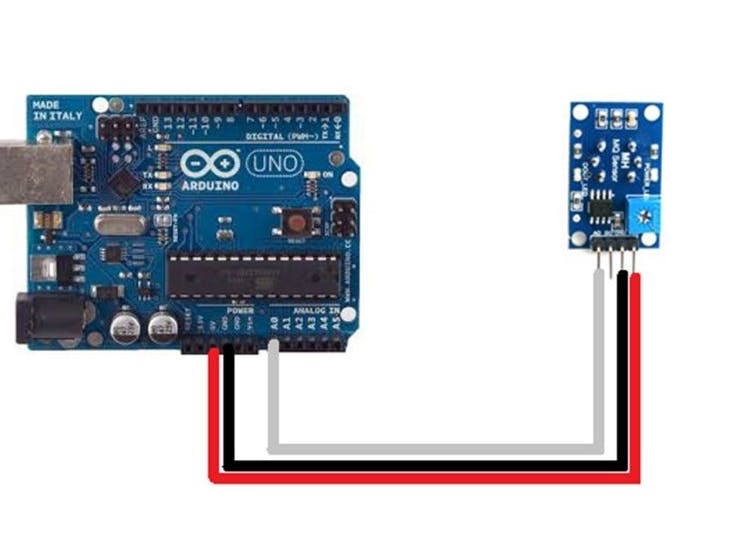
Mq-135 air quality sensor is used to detect the quality of the air. There are only 3 connections, one for ground, one for vcc, and one for Arduino input, which when bad quality in air is detected, can show high value or one or bad air is detected (some message that can manually be set ).
Placing Temperature and humidity detection sensor :
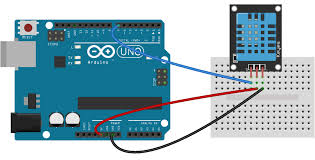
Temperature and humidity detection sensor is used to detect the Temperature and humidity. There are only 3 connections, one for ground, one for vcc, and one for Arduino input, which is used to send temperature and humidity.
Placing Human Presence Sensor (pir) :
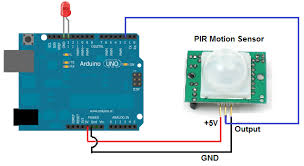
Human Presence Detection Sensor is used to detect the presence of a human. There are only 3 connections, one for ground, one for vcc, and one for Arduino input, which is used to send the presence of a human.
Working Of The Robot :
The Robot will move in random direction initially. If it triggers an object in front of it,with the help of UV sensor, it stops and captures the image of the object present in front of it with the help of camera. Then we, who are at a distance from the robot, can either see the object with Bluetooth or wifi according to our convenience. Then, if we want to pick the object, we will check the position of the bucket if it is filled or it is empty, If the bucket is empty, we can place the object in the bucket.
Other uses of the project :
- We can keep the robot in our home and keep track of any burglaries at night when we sleep.
- This robot can be used for cleaning macro sized dust particles.
- We can sense the presence of fire (if any) in our house, or in any industries (if this robot is placed in industries).
- We can detect motion of anything mischievous before the presence of the robot with the help of motion detection sensor and pir which can be used in many ways.
- We can also have an eye on air quality with the help of Mq-135, which will be helpful for people whoare working near poisonous gases.
- We can also have a look on the current temperature and humidity.


0 Comments